Tuesday, February 26, 2013

Masterchef inspired Sticky Fig and Caramel Cake


Last year (2012) one of the ladies on Masterchef baked a fig cake on an elimination round, I think what sold it for me was her home made hot custard she served with it, but I didn't get a chance to make a batch of that.  Since then I have been on the lookout for some reasonable purple ripe figs to invent a similar cake....

And finally I found them... at the Eveleigh Farmers Market in Newtown, Sydney Australia, open every Saturday from 8am til 1pm and has a large range of fresh fruit stalls, about half a dozen fresh meat variety stalls, 2 flower sellers, lots of baked good from fresh breads, cakes, marshmallows, patisseries, cupcakes and of course hot food and coffee.


So I arrived home with my loot of fresh fruit, vegetables and flowers, of course I cannot go without flowers! And I gorgeous cake was produced and in the oven within the hour! Check it out:

Sticky Fig and Caramel Cake

Cake :

150g Butter - room temp
150g Castor Sugar
1 Vanilla Bean - seeds scraped (and reserve pod)
2 Eggs
150g Plain Flour
5 tsp Baking Powder
1/3 cup Milk

Caramel Sauce :

1/4 cup Castor Sugar
50g Butter
1/3 cup Pure Cream
1/3 cup Honey
1 tsp Vanilla Extract

5 Large or 8 Small Fresh Purple Figs

Preheat oven at 180 degrees. Line your springform round tin (I used a 12 inch) with 2 layers of aluminium foil in the base of the tin to ensure caramel doesn't ooze out. I would also recommend a baking paper insert (a circle cut to shape to stop it sticking).

I recommend making the cake batter first, so place the butter and sugar into your mixer and cream them together until they are pale and fluffy.  Next crack your eggs into the bowl and mix them in thoroughly, and then add in your scraped vanilla pod seeds, beating them together.

Finally add in your flour and milk alternatively in three additions, and mix lightly until final addition is just combined.  Leave aside as you now need to make your caramel sauce to layer in the tin first.
To make your Caramel Sauce, place all the ingredients for the sauce into a medium saucepan and put your saucepan on the stove top on a medium heat.  Stir with rubber spatula until the sugar has fully dissolved and butter has completely melted.
Then bring the sauce to the boil, and cook it until the sauce turns a golden brown, remove the vanilla bean pod, and then allow it to cook for a few minutes until the sauce has a thicker consistency (like honey).

Take your prepared tin, cut your figs all in half and arrange cut side down into the pan.  Then pour the caramel sauce over the figs, covering them evenly.  After your have the caramel sauce layer in, then top with the cake batter, spread it evenly covering the sauce so none of it is exposed.  Then place the tin onto a baking tray, in case of any leakage in the baking. Put into the oven and bake the cake for 40-50 minutes, and test it is cooked through as different caramel consistencies and differing sizes of figs with alter the cooking time.

I served my slice of gorgeous cake with a scoop of vanilla bean ice cream, it went so well with the caramel.

Sunday, February 24, 2013

Gorgeous Orange Butter Cake


This morning I went to our local Farmers Market with my partner, Eveleigh Farmers Market, its an inner city Sydney market which is great.  First stop I purchased some luscious figs as I had been wanting to test out a cake (which I did and that recipe will follow this week - Sticky Fig Caramel Cake).

Anyway so my breakfast at 8.30am on a chilly rainy morning was a slice of gorgeous fresh orange butter cake with beautiful fresh icing, and I couldn't get it out of my head so that night I had to make some myself with Miss 3 of course at the ready with whisk in hand!

Orange Butter Cake

Cake

250g Butter - room temp
250g Castor Sugar
4 Eggs
1/2 Tbsp Orange Zest
100ml Orange Juice (approx 1 whole orange)
250g Plain Flour
5 tsp Baking Powder

Simple Icing Glaze

250g Icing Sugar Mixture (Soft Icing Sugar)
50ml Orange Juice
1 tsp Lor Ann Orange Bakery Emulsion

Preheat your oven to 180(350) degrees. Grease and flour your mini loaf tins.

Place butter and sugar in your mixing bowl and cream together until pale and fluffy.  Next add in your eggs one at a time and beat until fully combined before each addition to prevent curdling.

Then add in your orange zest and juice, this is one large orange.  Mix together well.

Finally sift together your flour and baking powder and stir in lightly to keep the mix fluffy and the flour un-bruised.

Pour batter into the prepared tins and only fill then half and the mix does rise alot, if you over fill the cooked cake will overlap and join.

Place into the oven and bake for 20-25 minutes. Makes 8 mini loaves or 24 cupcakes or 30 scallop bottom cuppies.

Allow cakes to fully cool before you prepare icing.

To make icing:
Just take a small bowl and place all ingredients into the bowl and stir, err on the side of caution with the liquid quantity, you made need to add extra icing sugar if too runny.  If too runny it willl slides off the cake.

Ice your cakes!!

Monday, February 18, 2013

Pancake Tuesday Creation! With Duck 'n' Maple!


It was Shrove Tuesday and I had pancakes on my mind for days, I had seen this post by I Am A Food Blog and the pulled pork looked devine but it doesn't agree with me very well. I was tempted to just go with the pain all for my foodies but I decided to come up with my own slightly off the wall creation instead.

I am mighty pleased with the result, it was the best pancakes I have had in quite a long time.  You really really and truely need to try it, if you don't like duck then go with the pork, just slow roast or pressure cook it so that you can shred it nice and easily.

Here is my iphone snapshot first that I put onto my facebook page... it had alot of my peeps drooling.

Pancakes with Shredded Duck and Maple Savoury Sauce

Pancakes:

1 cup Plain (All Purpose) Flour
1 tsp Baking Powder
1 tsp Bi Carb Soda
1 tsp Castor Sugar
1 Egg
1 cup Buttermilk

Topping/Sauce:


1/2 Peking Duck or 2 Duck Breasts
1/2 cup Brown Sugar
1/4 cup Castor Sugar
1/2 cup Water
1/4 cup Maple Syrup
2 Tbsp Hoisin Sauce
4 Shallots (Spring Onions)

Take a medium mixing bowl and place the flour, baking powder, bicarb and sugar in the bowl and whisk to mix the raising agents through.

Then add in your egg and buttermilk and whisk until it is a light smooth batter.  Leave mixture and let it sit for 15-30 minutes as you get a better result from a rested mix.

Heat a large frypan on the lowest heat setting on your stove top, and grease with butter.

I found it good to use a cup measure for pouring, scoop some mixture and pour in 3 even circles into your frying pan.  In 2-4 minutes the top of the pancake will bubble, this will indicate it is ready to flip over. Flip the pancakes and cook for a further 3 minutes until lightly golden, then remove from the pan and keep warm on a plate under a tea towel until they are all cooked.

Next take your duck and if you haven't bought it cooked, then cook it as desired.  I bought the easy peasy supermarket peking duck, so I just needed to leave it in the packet and microwave it for 2.5 minutes and let it sit and steam itself for a further 2 minutes, then voila duck ready to shred.

So now you have a piece of exquisitely cooked duck, take 2 forks, curved downwards commence to pull the meat apart so that it is completely shredded in a seperate bowl.

Take all the ingredients for the sauce, please them all in a small saucepan and stir over a medium heat.  Stir to dissolve the sugars and you will have a runny brown sauce, then allow it to simmer and bubble away, stirring occassionally until the sauce thickens to coat the back of your spoon. Then it is ready to serve.

To plate up, stack your pancakes, arrange your shredded duck on top, pour your sauce over the top of your duck and pancakes, then top with some sliced shallots for texture and bite, it is a great balance.

Makes : 2-4 servings / 9-12 medium pancakes (with left over shredded duck with I made into rice paper wraps)

Wednesday, February 13, 2013

Arnotts Iced Vovo Tart - Good Taste Mag Hit!


Australia Day was approaching and I have bought our local supermarket Magazine, The Good Taste.  And an old favourite Aussie biscuit was gracing the cover, being reinvented into a Tart/Slice.  It was a birthday at work and my fellow manager luuuuurves raspberries so I knew this would be a hit!

It has quite a lengthy list of ingredients and it is a bit fiddly  but NO baking required so thats a bonus, and if you need to speed up the process I did find you can place the base in the freezer to chill for 20 minutes and the filling can do a stint at the start in the freezer and transfer to the fridge.  If you are taking it with you anywhere I recommend, set the jelly on top then when set completely, keeping it in the tin, cover it in glad wrap and upon delivery/arrival pipe on the cream and sprinkle the coconut.

Iced Vovo Tart


Base :

100g Arnotts Iced Vovo Biscuits
150g Milk Arrowroot Biscuits (or similar)
130g Butter - melted

Marshmallow Filling :

150g Marshmallows (pink preferable but I only had white ones)
1 Tbsp Milk
2 sml drops Pink Food Colouring (if using food gels use a toothpick)
200ml Thickened Cream
1 tsp Vanilla Paste

Raspberry Jelly Coating :

2 x McKenzies Gelatin Leaves or 2 tsp Gelatin Powder
1 cup Frozen Raspberries
1/3 cup Water
1 Tbsp Castor Sugar

Topping :

200ml Thickened Cream
1 tiny drop Pink Food Colouring
1 Tbsp Shredded Coconut


To make the base first grease your tart tin (with removable base) with butter or spray with a light oil.  Place biscuits in the food processor and process them until they are a fine crumb, then add the melted butter to the mix and process until combine through and it starts to come together.

Turn the crumb mix out into your prepared tin and press it into the tin, you can use a glass to get a firm and even form.  Place it into the fridge for 1 hour to set firm and chill.

To make the marshmallow filling, place your marshmallows and milk into a medium saucepan over a low heat and stir continually until your marshmallows melt and the mixture is smooth.  Transfer it into a small bowl and add your food colouring and set aside for about 6 minutes to cool slightly. 

At this time place your thickened cream into your mixer and whisk in the vanilla until you have firm peaks forming.  Gently fold in half the cream into the marshmallow mixture, then fold in the 2nd half until combined.  Pour it over the biscuit base and smooth the surface.  Place in the fridge for 2 hours or until firm.

To make your jelly layer next, place your gelatin leaves in a small bowl and cover with some cold water, set aside for 6 minutes to soften (if you opt for gelatin powder then place 2 tsp in a small bowl with 2 tablespoons of cold water and leave until ready to add in approximately 6-10 minutes).   Stir the raspberries, water and sugar in a small saucepan over a medium/low heat and stir until the sugar has dissolved  bring the mixture to a simmer and allow it to simmer for approximately 3 minutes or until the raspberries turn to liquid.  Remove water from your gelatin leaves and add them to the raspberry mixture (or spoon the gelatin powder mix into your raspberries).  Stir this through until your gelatin completely dissolves through your mixture.  Take a large sieve over a heatproof bowl and pour your raspberry mixture into the sieve  push it through with a spatula, and discard the raspberry seeds.  Set the bowl of jelly aside and allow it to cool for approximately 25 minutes so it doesn't melt the next layer when adding it into the tart.

Carefully pour the cooled jelly over the marshmallow layer, smooth it so the layer is even and covers the entire tart layer and place it back in the fridge for at least 2 hours (or preferably overnight).

To make the Vovo topping, use an electric mixer, place the cream into the mixing bowl and whisk on high until it forms firm peaks then stir in the food colouring.  Spoon the cream into a piping bag with a medium star nozzle/tip.  Pipe rosettes in 2 or 3 rows along each long side of the tart.

Finish off with a sprinkle of shredded coconut. Voila!

Some Helpful Notes:

* To prevent your marshmallow filling mixture splitting, ensure you let the melted marshmallows cool before folding in the cream
* If you use the Gelatin Leaves as opposed to the Gelatin Powder you will achieve a clearer less cloudy jelly finish.
* Keep the tart in the fridge to ensure you can slice the tart easily, room temp will cause the knife to drag.

Tuesday, February 12, 2013

Valentine Last Minute Specials

I have some last minute Cookie Packs up for grabs for Valentine Gifts, so steal yourself a bargain today!

FIRST IN BEST DRESSED (up on facebook also) - Email me at cookiequeen@y7mail.com

Pick Up, Drop Off (conditions) and Postage available.

ALL FIVE PACKS - NOW $13.00

Hugs n Kisses


ALL SIX PACKS - NOW $15.00

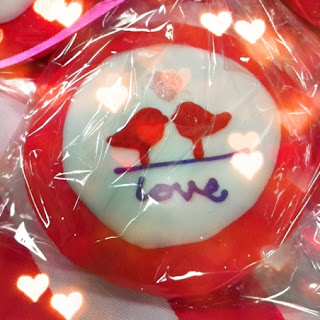
Love Bird Pack

Hearts & Lovebirds Pack

Mr Teddy Love Pack


TEDDY COOKIE BOUQUET - SPECIAL

ONLY $24.00 (RRP $35.00)

Lolly-filled Box (Giftwrapped in cellophane & ribbons)

JAR of HEARTS - LAST ONE

ONLY $15.00 - Glass jar & assorted cookie doughs!


Saturday, February 9, 2013

Currently Taking Orders : Valentine's Day Cookies

Currently taking your orders for Valentine's Day this week : 14 February 2013

Email your order to cookiequeen@y7mail.com

COOKIE PACKS AVAILABLE:

1. SEXY COOKIE PACK - $45.00
Includes : 6 Leopard Print Corsets & 6 Sexy Lace Corsets


2. LOVE BUG COOKIE PACKS - $38.00

Pack Includes:
6 Love Hearts
3 Love Bug (1 red + 1 pink + 1 white anteners)
3 Lovebirds


3. PINK LOVE COOKIE PACK - $20.00 (double for $36)

Pack Includes:
2 Sweethearts
3 Pretty Corsets
1 Cupid's Arrow Heart


4. KISS ME COOKIE PACKS - $20.00 (double for $36)

Pack Includes:
1 Frog holding a Heart
1 Queen of Hearts Corset
1 Pink Kiss Me Heart Conversation
1 Cupid's Arrow Heart
2 Sweethearts


Note any Cookies in the above packs can be made into duplicates of the same style.

Check out other Valentines Cookies at : Cookie Queen Kitsch'n Facebook Page 

SPECIAL
JAR OF HEARTS
$15.00


SEND SOME COOKIE LOVE with COOKIE BOUQUETS

ORDER NOW!!!! DELIVERY AVAILABLE in SYDNEY!!!!


Bouquet Pricelist
6 Cookie Pops = $40
8 Cookie Pops = $45
10 Cookie Pops = $50
12 Cookie Pops = $55

Teddy Cookie Bouquet Box 

(Valentine Gift Box with Glitter Heart Pick & Lolly-filled)


Kiss Me Valentine Box 

(Valentine Gift Box with Glitter Heart Pick)
1 or 2 Frog Cookie/s and remainder of number of decorated heart and circle cookie pops

Box Options (for above Cookie Bouquets):-

ROSE & DARK CHOCOLATE GANACHE MACARON PACKS available for $25 per Dozen

- add them to any cookie order

FLAT FEE DELIVERY IN SYDNEY for Valentines only = $20.00 (limited spots & delivery area)
PICK UP AVAILABLE Prior to Valentine's Day.

All Cookies come sealed individually in cellophane bags tied with satin ribbon, however gift boxing is available for an optional extra.

Cookie dough Options:-

Plain
Chocolate
Red Velvet
Funfetti Love Dough
Pink Jewel Dough