Wednesday, January 30, 2013

Delicious Double Chocolate Walnut Brownies

I had a close friend that I was meeting for lunch on our holidays, I awoke wondering what I could take her to cheer her up.... a chocolately fudgey gooeiness thats what!

So buckle up and enjoy the ride along the fudge highway to another delectable delight to tickle your tastebuds! I can assure you that this is a recipe worth mixing, it took me only 30 minutes to prepare and then 50 minutes to bake it! A good one to whip up just before guests arrive.... because they make your house smell like you are a Domestic Goddess!

Double Chocolate & Walnut Brownies

200g Dark Cooking Chocolate
175g Butter
3 Eggs
150g Plain Flour
250g Castor Sugar
50g Walnuts - chopped
200g Darking Cooking Chocolate - roughly chopped

Preheat the oven to 160 degrees.  Grease and flour your 13 x 9 inch tin.

Using a heat proof bowl put over a small saucepan of simmering water.  Place 200g of chocolate broken up, and the butter into your bowl, and continue to stir over the heat until your chocolate  and butter are completely melted and glossy.

Take a large mixing bowl and sift together the flour, baking powder and sugar into the bowl.  Next stir in your melted chocolate mixture.

Finally roughly chop your walnuts and 200g chocolate and add them to your mixture and stir until combined.

Pour your mixture into your prepared tin, and place the tin in the oven and bake for 50 minutes.

Remove and allow to cool for 15-20 minutes.  Cut off the sides of the brownie first and then slice the slab into squares.

I got 15 neat squares.

I highly recommend eating at least one piece whilst it is lovely and warm.
This is devine, why o why have I never made brownies before in my life??? Where have you been?

Tuesday, January 29, 2013

Happy Australia Day with Lemon Myrtle Lamingtons!


Wishing all the Aussies a very Happy Australia Day! To celebrate I decided after seeing some of Zumbos creations online for some unusual aussie treats, that I would combine my love of lamingtons with my BIG love of an Aussie Herb Lemon Myrtle! I could smell the essence of those leaves all day looong!

Lemon Myrtle Lamingtons

Cake

190g Butter - room temp & cubed
1/2 cup Castor Sugar
3 Eggs
1 tsp Vanilla Essence or Extract
1/2 tsp Lor Ann Coconut Emulsion (optional)
1 cup Milk
2 1/2 cups Self Raising Flour

Coating

4 Egg Yolks
90ml Lemon Juice
3/4 cup Castor Sugar
8 Lemon Myrtle Leaves - ripped & bruised
100g Butter - cubed & cold
2 cups Shredded Coconut

Pre heat oven to 180 degrees.  Grease and flour a standard lamington tin.

Place butter and sugar into the mixer and cream together.  Then add in one egg at a time to the mix, beating each addition well.

Add in the vanilla and as an option some Lor Ann Coconut Emulsion, I love this stuff!

Measure out the flour and the milk and then add alternatively in 2-3 batches.  Only beat lightly at the end so as not to bruise the flour.  Once ready and you will know because it will be a nice light creamy mixture with no lumps.

Pour your mixture into the prepared tin and place it in the oven for approximately 40 minutes.

Remove and let cake go completely cold, refridgerate if you have to, I left mine overnight and glad wrapped it once cold.

Place sugar and bruised split lemon myrtle leaves in a jar to infuse (I left mine overnight).

Then sift them out and put the sugar in a medium saucepan with egg yolks, lemon juice and salt and whisk on a medium heat until it is thick enough to coat the back of a spoon. About 10 minutes. Do not stop stirring and do not allow the mixture to boil or it will become lumpy. Then remove from heat and whisk one cube of butter at a time.  Set aside and allow it to cool.

Once curd is cool, line up your process line of :
1. Cut up cake (slice off the baked edges)
2. Curd
3. Shredded Coconut
4. Empty Plate

One piece at a time, take cake cube, turn it through the curd coating all sides.  Then roll the coated cake cube through the shredded coconut.

Place the lamington piece onto the plate, I recommend the cubes to not touch so the air in the fridge gets to all sides for the coating and coconut to set.

Coat and Crumb all pieces of your cake, I got exactly 12 pieces.

Place the plate of lamingtons in the fridge for at least 30 minutes to set.

DEVOUR!!!

Sunday, January 27, 2013

Cookbook 1 : Miette - Double Chocolate Cake

First of my Cookbook Challenges for the year, I have chosen a gorgeous looking one from a San Francisco Bakery called Miette. It has the prettiest layout with scalloped pages, my Mum took one look at it on my coffee table last year and fell in love with it.  I even bought it for 2 birthday gifts in 2012 because its such a stunner!

So make sure you put this on your birthday list this year, available at www.thebookdepository.com (free shipping worldwide):


The cake itself is a wonderful thick chocolate cake, so moist and lucious.  I have made it in a triple layer and a double layer, I highly recommend the effort of a triple layer in the 6-7 inch tins, I felt that it was glorious with the three fudgey layers with ganache in between.

Double Chocolate Layer Cake

1 1/2 cups Plain (all purpose) Flour
1 1/4 cups Unsweetened Cocoa Powder
1 1/2 tsp Bicarb (Baking) Soda
1/2 tsp Baking Powder
3/4 tsp Salt
2 Ounces 70% Cacao Chocolate - chopped coursely
1 cup Boiling Water
1 cup Buttermilk (I use my previously advised subsitute of 1 cup full cream milk with a Tbsp Lemon Juice)
1/2 tsp Vanilla Extract
2 Large Eggs - room temp
1/2 cup Vegetable Oil
2 1/4 cups Castor Sugar

Grease your tins extremely well, I go against my rule of grease & flour for this one to avoid a floury coating on your cake layers. If you prefer to dust your pan you can do so with cocoa.

Pre heat your oven to 350 (180) degrees.

Firstly sift your dry ingredients into a large bowl, this is your flour, cocoa, bicarb soda, baking powder and salt. Set aside.

Place your chocolate in a large glass or metal bowl (heatproof), pour your boiling water over the top of it and stir until the chocolate is completely melted.  Set aside and let it cool for 15 minutes.

Prepare your buttermilk if your like me (I take one cup of full cream milk and add a squeeze of fresh lemon until it curdles) and then add your vanilla to it. Set aside

Using your Stand mixer, place your eggs into the bowl and whisk on high until foamy (approx 2-3 minutes), reduce to low and pour in your oil and whisk until combined. Raise the speed for approx another 30 seconds.

Reduce back to low and slowly pour in the cooled chocolate into the egg mixture.  Next slowly pour in the milk vanilla mixture.  Then add in your sugar and whisk until the batter is smooth and liquid, approximately 2 minutes.

Next stop the mixer and remove the bowl, add in your sifted ingredients and mix in by hand until combined, ensure your run your spatula along the bottom of the bowl to ensure it is all combined well.  The batter will probably still appear quite lumpy but stop mixing it as over mixing will bruise the raising agents.

The final step is a little unusual but it definately produces a more superior cake finish.  Take a seive not too fine, and pour your mix into it, using your spatula and push through the lumps, discard any lumps that down easily push through the sieve.

Divide your mixture into your prepared pans and bake each one for approximately 45-55 minutes depending on your oven.  To test stick centre of cake with a skewer and check it comes out clean.

Let cool in pan for 20-30 minutes and turn out onto a wire rack and allow to completely cool.  Once cold wrap in 3 layers of gladwrap (cling film) and place flat into the freezer.  You can store in the fridge or freezer from 1 hours to 3 days, I prefer overnight.  It can store in freezer for up to 2 months. Ganache a cold cake for the best results.

Helpful Notes in Miette Cookbook (Quoted Below from pages 18 and 55) :

  • "We use natural cocoa powder not dutch-processed, as the dutch-processed cocoa has been treated with an alkalizing agent that heightens the colour of the cocoa but gives it a milder flavour".
  • "If you choose to use this recipe for cupcakes, fill each cupcake liners with 2/3 batter and bake at 350 (180) degrees, and bake for approx 20 minutes, makes 2 dozen cupcakes".
  • "Adding Eggs - Add your eggs slowly and carefully, this process simply cannot be rushed as you are emulsifying a liquid into a fat.  If not done gradually you risk 'breaking' the batter, the termfor when the fat and liquid that are beginning to hold together in a mixture suddenly seperate again.  Add eggs one at a time and ensure they are fully mixed in before adding the next."

Friday, January 25, 2013

Three Ways to achieve Marshmallow Frosting!

I absolutely LOOOOOVE marshmallow frosting, much much more than buttercream and 1000 times more than cream! Its light, its fluffy, and it goes with sooo much more flavours and best of all I can eat a truckload of it!


I have based the quantities on all of the frostings below for 12 muffin size or 24 regular size cupcakes.  This can be piped straight onto your cupcakes (or cake or whatever else). Shown in the picture above, this is an example of meringue or marshmallow at 'Duck Beak' stage, when your mixture is at the point that it looks like this when you remove the whisk beater and it stays in this form, it is ready to use.

1. Marshmallow Frosting - Boiled

2 Egg Whites
1/2 cup Castor Sugar
1/4 cup Light Corn Syrup (we have debated this but I'd suggest glucose syrup to be similar if need be BUT many health food stores do stock Corn Syrup in Australia these days)
2 Tbsp Water
2 tsp Vanilla Extract
Pinch Salt

Place all ingredients into a heatproof glass (or stainless steel) bowl on top of a saucepan of simmering water.  Using a handheld mixer or a stick blender whisk the ingredients on the double boiler on high until thick and fluffy, this should take 7- 10 minutes.  Remove the bowl from the heat and continue to whisk it on high until the meringue mix has cooled.  You can now add your flavours and colours and mix well. Your now Ready to Pipe!

RESULTS OF BOILED FROSTING


2. Marshmallow Frosting - with a Tub of Fluff

1/2 cup (or 125g) Butter - soft
1 1/2 cups Fluff (or Creme Marshmallow)
1 tsp Vanilla
3 cups Icing Sugar

Place Butter, Fluff and Vanilla into your mixer with whisk attachment. Whisk on a medium speed until a cream consistancy.  Then add in 1 cup of icing sugar at a time. You can flavour or colour at this stage.  Whisk on medium high to combine and whip up.  Your now Ready to Pipe!

RESULTS OF FLUFF FROSTING


3. Marshmallow Frosting - Whipped

4 Egg Whites
Pinch of Creme of Tartar
1 1/2 cups Castor Sugar
1/4 cup Water


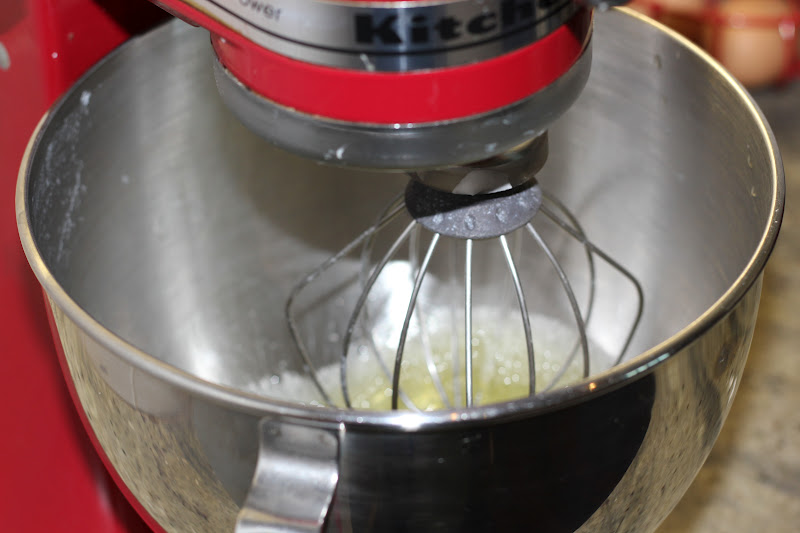
Place Egg Whites in an electric mixer and whisk on high. Meanwhile place your Sugar and Water into a heatproof bowl of a saucepan of simmering water (not touching or your bowl will crack), and stir over medium heat until the sugar has dissolved. Add you colour at this stage to syrup.  Then stop stirring and allow to boil for 3-5 minutes until you reach 115 degrees (soft ball stage with candy thermometor), during this stage just use a pastry brush and water to wet the insides of the saucepan to prevent sugar crystals forming.  Once the egg whites have started to form soft peaks, add the creme of tartar.  When the syrup reaches 120 degrees then remove from the heat and pour it into the egg whites avoiding hitting the whisk.  Then whisk for a further 15 minutes until your have a thick stiff glossy batch of icing. Now you are Ready to Pipe!

RESULTS OF WHIPPED FROSTING