Showing posts with label Christmas. Show all posts

Thursday, January 10, 2013

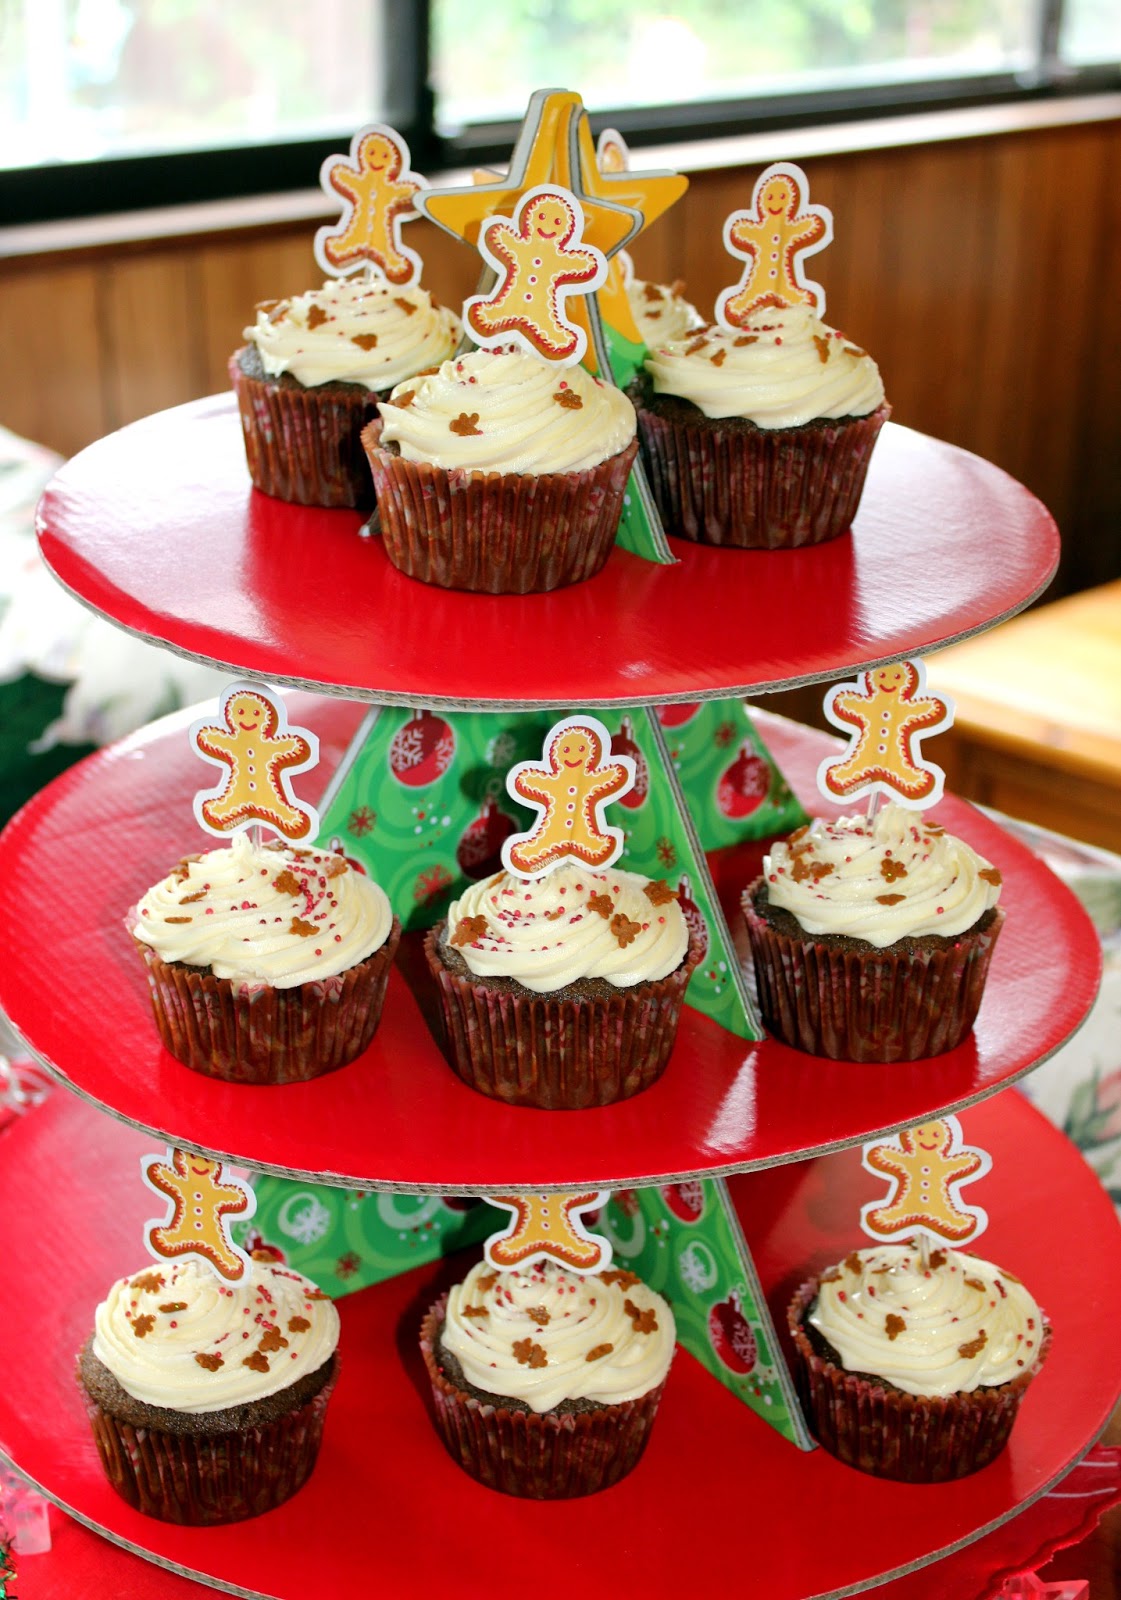
Challenge No 12 - Christmas Gingerbread Man Cupcakes

Month 12 - December
Blog 12 - Tidy Mom http://tidymom.net/

Recipe 12 - Christmas Gingerbread Man Cupcakes http://tidymom.net/2011/gingerbread-cupcakes/

I have no idea what has happened... but I cannot locate any step by step photos I took of making the actual cupcakes %;'&*? What the?? But on the other hand I have some really nice pics of the finished product, and isn't that the main thing? I am certain it is. Ok so I'll stop convincing myself lamely now and apologise to all my peeps for the absence of the step by step pictorial, they are super easy peasy so go for it and bake a batch this holiday season. You will adore them!

Christmas Gingerbread Man Cupcakes


1/2 cup Vegetable Oil
1/2 cup Castor Sugar
1/2 cup Molasses
1 Egg - room temp
1 1/2 cups Plain (all purpose) Flour
1/2 Tbsp Ground Ginger
1 tsp Ground Cinnamon
1/2 tsp Salt
1/8 tsp Ground Cloves
1/2 cup Boiling Water
1/2 tsp Bi Carb (Baking) Soda

Pre heat your oven to 180 (or 350) degrees.  Line your cupcake pan with patty wrappers or grease and flour well.

In your mixing bowl combine your sugar, oil and molasses and put mixer on medium and mix well.  Then add in your egg and mix until combined.

Sift all your dry ingredients into a large seperate bowl, whisk them lightly together, be careful not to whisk much as you will bruise the flour and raising agents.  Gradually add the dry ingredients into your wet mixture and stir through gently.

Boil your water in a small saucepan, once boiled, remove it from the heat and stir in the Baking (Bi-carb) soda.   Whisk it quickly then into your cake batter.

Take your batter and fill each cupcake wrapper approximately two thirds (2/3) full, and tap it on the bench to remove air bubbles and place pans in the oven on middle shelf and bake for 20-25 minutes.  Test before removing from the oven that you cupcakes spring back when touched, or that a skewer comes out clean once put through the centre of a cupcake.

Frost your cupcakes once they have completely cooled down.

The frostings I found most compatible with these cupcakes are a Toasted Marshmallow (preferably boiled) or a Lemon Buttercream.
Tuesday, December 18, 2012

Christmas Cookie Order Time !

Its that time of year again and if you love cookie packs as gifts for someone special... Nanna, Mum, Kids or just to display on the table of delights, then I have the perfect thing just for you!

CHRISTMAS COOKIE PACKS!!


Sold in Multiples of 6!

To order please contact me at : cookiequeen@y7mail.com

Cookie Packs will be : Cookies individually wrapped in cello bags with satin ribbons and boxed.  They will be available for Pick Up from Stanmore Sydney on most days at a pre-arranged time or I post (boxed only) via Express Post and this will take place on only :
Friday 14th Dec
Monday 17th Dec
Thursday 20th Dec
Friday 21st Dec

PICK UP = Sat 22nd, Sun 23rd & Mon 24th.

You get to select your desired Cookie Dough :
  • Traditional Gingerbread
  • Dark Gingerbread
  • Sugar Cinnamon
  • Sugar Vanilla

Packs start from only $20


CQK SPECIAL:

Alternatively a GREAT Christmas idea is Image Cookies, put your child's Santa photo this year onto cookies, these can be done on circles or squares(usually $4.00 per cookie).
PRICE :
12 for $32
30 for $62
A great Christmas Card alternative!

Christmas Cookie Packs (names of packs on the actual photos below):


Thursday, December 13, 2012

2012 The Great Food Blogger Cookie Swap


I am so excited to once again to take part in The Great Food Blogger Cookie Swap, this is the 2nd year it is running, and it runs internationally with it being mandatory that there is at least 4 Food Bloggers that enlist in your country to qualify.
I am actually super excited as my 1st Cookie Swapper sent me one of my cookie packages already and they smell soooo delicious and chocolaty its seriously not funny. My household has been pestering to eat them for the past 2 weeks, so they are in lock down! The cookies that is.

As I used my traditional family gingerbread recipe last year and opened up the vault and shared it with you all already, this year I have taken a recipe from one of my Cookie Idols and I have made them and used her design to show that the Cookie Queen Kitsch'n can implement any design that takes your fancy (within reason of course hee hee)..  I thought these little Nutcrackers were gorgeous and I have been itching for over a month to start these babies up!

The Gingerbread is based on Orange and Molasses and I wasn't sure how it would go, but I LURRRRVE gingerbread so it wasn't hard to please me and on many nights I have wanted to devour the lot... in fact I even made a whole extra 12 cookies just so I get to keep some myself this year (which i never ever do)!

So here we go......

My recipe is from Sweet Sugar Belle Adventures, here is the link I used:
 sweetsugarbelle.com - Nutcracker Ornaments
Now brace yourselves for a wonderful aroma that you are about to enter into when you bake up this baby, its like entering a world of Willy Wonker in the Gingerbread land...

Orange Molasses Gingerbread Nutcrackers

(as usual I have made some slight adjustments to the recipe)

1 cup Butter - room tempreture
1/2 cup Castor Sugar
1/2 cup Dark Brown Sugar
1 1/4 cup Molasses
2 Eggs
1 tsp Orange Rind
1 Tbsp Orange Juice
5 1/2 cups Plain Flour
1 tsp Bi-carb Soda
1/2-1 tsp Salt
2 tsp Ground Ginger
3 tsp Ground Cinnamon
1 1/2 tsp Ground Cloves
2 tsp Ground Nutmeg

Pre heat oven to 190 (or 375) degrees UNLESS you do what I do and chill dough in fridge overnight.

Cream together the butter, castor sugar, brown sugar and molasses, they will become a thick silken mixture that looks devine. Personally - I start with the paddle attachment and swap to the dough hook when I begin adding the dry ingredients.

Whilst you cream the above, sift all of your dry ingredients into a large bowl and set aside.

Add the eggs one at a time and mix them in well, then add in your orange rind and juice.  Using a cup measure, add your dry ingredients a cup at a time into your wet mix in your mixer, and eventually after a few minutes it will start to form a dough.

Once the dough has formed into a ball, remove it from the mixing bowl, and split it into 3 balls, flatten the balls into discs and wrap in cling film (or glad wrap), and place into the fridge for at least an hour.  This will chill and firm up your dough for rolling.

It is recommended to roll this dough between baking paper but I personally just rolled it out on a floured surface, and it was easily managable.

Roll and cut out your cookie shapes, place them onto baking paper lined tins, bake them for approximately 10-15 minutes, depending on the size of your cookie. They will brown up a little but should be baked longer then 20 minutes or else they will burn.

Wait for your cookies to be completely cold before you set about icing them, otherwise the icing will heat and run.

Decorating Stages:

Stage 1 - Pipe your outline of the green hat and red chest.
Stage 2 - Flood or fill the green area
Stage 3 - Flood or fill the red area
Stage 4 - (wait overnight) Pipe the face/skin tone of choice
Stage 5 - Flood or fill the face area
Stage 6 - Pipe on the darker green triangles onto green hat
Stage 7 - (wait overnight) Pipe on the nose
Stage 8 - Flood or fill the cravat with yellow
Stage 9 - (wait a couple of hours) Pipe on black eye dots
Stage 10 - Pipe on the black buttons onto cravat
Stage 11 - Pipe on red mouth dot
Stage 12 - Pipe on black moustache
Stage 13 - Pipe on red dots onto hat
Stage 14 - Optional (wait overnight) Pipe on white line on hat trim and coat with white non-pariels


HO HO HO MERRY CHRISTMAS TO ALL!

STAY TUNED... for my post soon on the delicious cookies and who baked them with linky links to their fab blogs once I receive them all as I have one to go!

Monday, December 10, 2012

Lets kick off the Silly Season with Rudolf Cupcakes!

HO HO HO Merry Christmas...... I can hear Santa preparing his sleigh already for his Elves to fill with goodies for all the good boys and girls worldwide!  And in light of this excitment I am kicking off this Silly Season with a fun cupcake to do that the kiddies will all love!!


Because who doesn't love a fun, happy, giggley reindeer that we all know and love? Noone? Excellent! 'Cause I have just the activity and you can even get the kidlets to help you.

I used my personal recipe I always follow for a great chocolate cake as its dark and fluffy and super quick, my Miss 3 often assists in the mixing stage, and as opposed to a dense chocolate cake its great for cupcakes.  I came up with these after I found a packet of chocolate coated pretzels at the shop that I thought looked just like antlers!

I am entering this Rudolf the Red-Nosed Cupcakes in the Creative Holiday Recipe Contest hosted by Kristan at Confessions of a Cookbook Queen and Shelly at Cookies and Cups! Just because I follow them both religiously and love to bake there prized blog posts myself... I feel honoured to be able to share one of my recipe creations on their Blog with you all.  In fact I have only just posted today a whole Christmas Post on Food Bloggers I LOVE! Kristan & Shelly are right up there, dont miss the post for a great lot of Food Bloggers to enjoy...

Rudolf the Red-Nosed Cupcakes

Cake (OR you can use a Betty Crocker Packet Cake Mix in Devils Food):

1 3/4 cups Plain Flour
2 cups Castor Sugar
3/4 cup Dark Cocoa Powder
2 tsp Bi-carb Soda
1 tsp Baking Powder
1 tsp Salt
1 cup of Milk
1/2 lemon - squeezed
1/2 Vegetable Oil
2 Lrg Eggs
1 tsp Vanilla Extract
1 cup Boiling Water

Decorating :

Tub of Chocolate Frosting
Red MnMs (or skittles)
Chocolate Coated Pretzels
Icing Eyes (Wilton or similar)
Snouts (I used my Gingerbread Cookie recipe, but you can use a store bought small round cookie)


Preheat oven to 180 (350) degrees. Grease and flour your cake tin or line cupcake pan with patty cake wrappers.

In a medium bowl sift together the flour, sugar, cocoa, bi-carb, bakign poswer and salt. Set aside.

Fill jug with 1 cup of milk and squeeze in the lemon juice and set aside (this will curdel like yoghurt) leave for 5-10 minutes.

Crack your eggs into the eletric mixer and whisk until foamy, then add in your vegetable oil and vanilla and mix well for 3 minutes.  Add in the milk concoction and mix well.  I suggest to change your beater from a whisk attachment to the paddle.

In 3 instalments add in the dry sifted ingredients and mix on a low setting. Once just mixed (do not overmix) then add in the cup of boiling water and I recommend stirrign this through with a spatula, ensuring you are scraping mix from the bottom so with all ingredients are mixed in well without a risk of over beating, as this will cause it not to rise.

Pour your mixture into your patty cake wrappers, I use 2 soup spoons to fill wrappers and I fill them 1/2 - 3/4 to the top with batter.

Bake in the oven for 20-25 minutes.

Once completely cold, you can begin to decorate as follows :


I cheated... shhhhhh... I used a tub of Betty Crocker pre-made Chocolate Frosting to save time at Christmas Crazytown time.  Soooo cover your cupcake in chocolate frosting and stick the snout onto one side of the top of the cupcake.

Next add your eyeballs and antlers (pretzels)!

Finally arrange on a fabulous cupcake stand to show off your hours (cough cough - not) of hard work creating these babies!!


A Very Bloggie Christmas - My Fav Bloggers!

All I want for Christmas is......

Some Great Blogs to Read!


I often wonder what people like to read, books, magazines, blogs etc... what do you enjoy reading?  Mine are recipe books, foodie magazines, a non-fiction novel with a strong storyline usually based pre 1950, and BLOGS! But not just any blogs, mainly baking blogs! Occassionally I jump onto a blog for home decorator or craft idea reasons but I often jump back off it as they dont usually hold my attention as much and I can't afford to clog up my email.  I do prefer to get them on email as not all of them appear in my Blogroll Feed and I dont get to my Bog every day or as often as I like to....

So anyways.... I have decided to collate a list of the blogs I REALLY REALLY and TRULY TRULY follow religiously that I LOVE, and its mainly for the recipe ideas and the content and how well they are written or photographed, a couple are for Cafe/Restaurant write ups as I love to try new places locally that you may not hear about otherwise, I value peoples opinions such as Lorraine at Not Quite Nigella.  I constantly cook from some of my fav bloggers such as Ree from The Pioneer Woman and Heather at Sprinklebakes and lets not to forget Shelly at Cookiesandcups! and we all know I Lurrrve Marian at Sweetopia!!

I also absolutely love finding new Blogs out there, I stumble across alot via simple Google searches when hunting down a recipe idea, but please add comments below of the Blogs that you follow or read and use regularly, I would love to take a squizz and maybe join them too...

Links to MY FAVOURITE BLOGS:

  1. The Pioneer Woman
  2. Not Quite Nigella
  3. Cookies and Cups
  4. Sprinklebakes
  5. Bake @ 350
  6. Sweetopia
  7. Sweet Sugar Belle
  8. Haniela's
  9. The Decorated Cookie
  10. I am Baker
  11. My Baking Addiction
  12. The Girl Who Ate Everything
  13. Bubble and Sweet
  14. Confessions of a Cookbook Queen

 Some piccies of my Bloggers:


Thursday, December 29, 2011

Cookie Swap 2011 Guest Post from Gourmet Getaways


As I promised you all I would blog on my received cookies from Julie @ Gourmet Getaways. I have only received 1 of my 2 cookie lots, so to date I can only give you the one I have, hopefully (fingers crossed) I receive my 2nd dozen soon.

My cookies came from Julie at http://gourmetgetaways.com.au/, which I was quite excited about, her food blog is full of amazing ventures and tastings that make me want to sneak into her handbag and sample the wares also.  If you’re like me you would also know Lorraine at Not Quite Nigella (I have been lucky enough to win 2 prizes through her blog and I read her daily posts via email with relish) and I follow her recommendations on cafes, restaurants, hotels, events etc, well Julie is very much the same with photography that puts me to shame!  She has made my cookies look like something in an American shop window or candy store!


Julie made me some traditional Dutch Speculaas. Please find the Cookie Swap Recipe here on Julie’s Blog http://gourmetgetaways.com.au/entries/general/the-great-cookie-swap-2, definitely worth making, they are super scrummy! The recipe is a keeper in my Christmas file.  Whilst you’re at it whip yourself up a batch for the family, and sit down and enjoy them with a Hot Chocolate and read the delights on Gourmet Getaways.

Wednesday, December 28, 2011

Christmas That's a Wrap!


Well it is the day after Boxing Day and I think I can say It’s a Wrap to Christmas for another year... I really felt this year came careering down a hill throughout December and the snowball and myself collided at full throttle!  I raced against the clock to get the presents bought then wrapped, the baking completed and parties catered and attended.

It was my two years old’s first Christmas where she really knew what it was all about in the way of who Santa is, what Christmas Carols are and what was adorable is that for 2 days of wrapping I was building the pile under the tree and she never once tried to open them, however we did colour one of Poppy’s with a bit of green texta!  Even on Christmas Eve at my parents her highlight was carrying the dozens of gifts and placing them under the tree one at a time from the car and bedroom, she was in her element!

The turkey was traditionally baked on Christmas Eve so that it fills the house with the glorious smell of it wafting through the house all evening (we then actually refrigerate it to eat cold or warmed on Christmas & Boxing Nights).  We spent Christmas Eve baking the last of the goodies and setting the family dining table and finalising the wrapping.

We all ooo’d, aaah’d and laughed til we cried over Marley Rose (my 2 two yr old) with her excitement over Christmas, she loves all things special, sparkly, glittery, Christmassy, you name it!  Santa brought her a beautiful outside cubby house that she calls her Coffee House and at first she was hesitant to cross the threshold but we went forth in the end and LOVE it with relish. It has a letterbox, a stove top, a kitchen sink and a tool bench.  There was ALOT of present opening, following by EVEN MORE eating, sitting down to the traditional Roast Pork with baked potatoes, carrots, parsnips (which mum insists she always does and the rest of us all heavily debated that they have never made an appearance on the Christmas table previously in 37 years!), Pumpkin Pie and peas. Complimented with Apple Sauce, Gravy, Mint Jelly, Cranberry Sauce, whatever takes your fancy.  Lunch commences with the explosion of Bon Bons and then we all dig into the bag for our traditional Silly Christmas Hats (I opted tis year for the delicate white and diamante reindeer antlers).

I want to share with you all my Christmas in pictures, I got my first SLR camera in June, was too scared to use it at all til August and now I rarely go anywhere with out it!


Wishing you all a Very Merry Christmas for 2011, I hope you and your family had a safe and happy year. Thank you for taking the time to come on my travels this year.