

I am very excited with the commencement of my Blog and Cookie business this year, and to now take part in The 2011 Cookie Swap hosted by http://www.loveandoliveoil.com/category/cookie-swap and http://www.thelittlekitchen.net/2011/10/25/the-great-food-blogger-cookie-swap/. Three of us subscribed in Australia, and I was thrilled to come up with a fabulous Christmas Cookie to send out to my fellow Aussie Cookie Exchangers.
I have gone with a family recipe my Mum has used annually since the 1970s, it is used for her Christmas Gingerbread house, but I love to also use it for cookies, as it makes a soft but firm cookie that is perfect to decorate and/or hang on the Christmas Tree. And it keeps really well, so you can definitely start the baking a month out from Chrissie! Plus everyone always raves about how delicious they are! An exciting thing we started 3 years ago was a “Gingerbread House Day”, where we invite friends to take part and each person makes and bakes their own house pieces (Walls & Roof), this can be done well in advance, and bring it on the day along with a contribution of candy, lollies and bits & pieces to decorate with together. It is super fun to see what everyone picks and brings along, we share them all communally, and I make everyone’s royal icing and supply the silver boards for the houses to go on, plus icing sugar (snow) to top off your creation. Because quite frankly there is nothing like snow in the middle of summer here in Australia!! Last year saw some extra imagination go into them with battery operated lights, stained glass windows and outside scenes. I am looking forward to our 2011 Gingerbread House Day, it will definitely be blogged following the event on the 11th December in the not so distant future so stay tuned.
So on that note, I have designed a fun cookie for the Cookie Exchange, some cute little Snowglobes. Here is a great family recipe (I’ll now have to dispose of you all in due course for revealing the secret recipe)! So get out your mixers & arm yourselves with your rolling pins and flex those muscles.... because here comes a knock out cookie heading to a kitsch’n near you!
 |
| Magical Christmas Snowglobes |
Gingerbread
90g butter
1 cup brown sugar – firmly packed
1 cup honey
2 tsp grated lemon rind
2 eggs – lightly beaten
5 cups plain flour
1 cup self-raising flour
1 tsp bicarb soda
2 tsp ground ginger
1 ½ tsp ground cinnamon
1 tsp ground cloves
½ tsp ground nutmeg
½ tsp ground cardamom

Method
Step 1.
Combine butter, sugar and honey in saucepan and stir over a low heat until sugar is dissolved and butter melted, cool for 10 mins and stir in the rind. Transfer mixture to large bowl, stir in eggs and sifted dry ingredients (important to sift together first). Turn dough onto lightly floured surface, knead gently until mixture loses its stickiness, cover in gladwrap and refrigerate for 1 hour.
Step 2.
Cut out the paper pattern whilst the dough is refrigerating.
Step 3.
Preheat oven to Moderately Hot (190’C gas or fan forced or 220’C electric non fan forced)
Roll dough out on floured surface until approx 0.5-1cm thick (too thin and it risks breaking or wont be strong enough to hold the roof on when full of icing & lollies). A hint is to half your dough first and do a wall and roof piece from first half and the same from the 2nd half of dough. Then with the remainder you can cut out chimney, trees, santas, reindeers, stars, window shutters if desired etc. Place cut pieces onto on a lightly greased baking tray (recommended to also use Glad Baking Paper), and bake on middle shelf for approx 15-20 mins (until golden brown).
Step 4.
Make your Glaze in small pan on stove, stir over heat until sugar dissolved. Stand to cool for 5 mins and transfer to cooling racks, and brush each piece with glaze whilst still warm. This will ensure pieces are glossy.
Note : The Gingerbread can be baked weeks in advance but keep dry & container will make it too soft.
IMPORTANT : DOORS AND WINDOWS!!! You can do this 2 ways, cut them out before baking OR cut out when glazing this way is easier ( & I brushed the glaze in the edges to smooth them). Cut door out but keep it and bring along so that you can ice it on propped open. Windows can be cut in half and iced on as shutters if desired or otherwise use lollies. If you forget you can always ice your windows or use lollies.
Start thinking of a theme you want to possibly go with, and roof designs, it helps on the day if you have something in mind to work towards. It is so much fun to see what everyone thinks of and brings along to share with everyone, as everyone brings selection of different kinds of candy treats. Wood Cabin, Santas Village
Royal Icing – Version 1 To ice and flood
2 cups Pure Icing Sugar (powered sugar)
1 1/2 Tbsp Meringue Powder
3 Tbsp Water – room temp to warm
Royal Icing – Version 2 (Gingerbread House alternative)
4 1/4 cups Pure Icing Sugar (powered sugar)
2 Egg Whites
1 tsp Lemon Juice
To decorate Snowglobes


Using a Squeeze Bottle – fill globe with pale blue flooding icing.
Using a squeeze bottle – dot white spots into the blue on the surface.

Once globe dried, flood the bottom space in white and cover in crystal cut clear sugar.
Using another colour (example red) with Tip #3 – pipe and fill a base to the globe.
Once globe completely dry – Using white icing with Tip #2 – pipe a Snowman is 3 large dots.

Using black icing with tip #1 – pipe a hat onto the Snowman.

Optional to put arms or candy cane onto the Snowman whilst still wet.

Again wait til completely dry – using edible textas draw on eyes, mouth, buttons and carrot nose.

Finally sprinkle the globe with edible disco white glitter to add a touch of sparkle to your cookie!
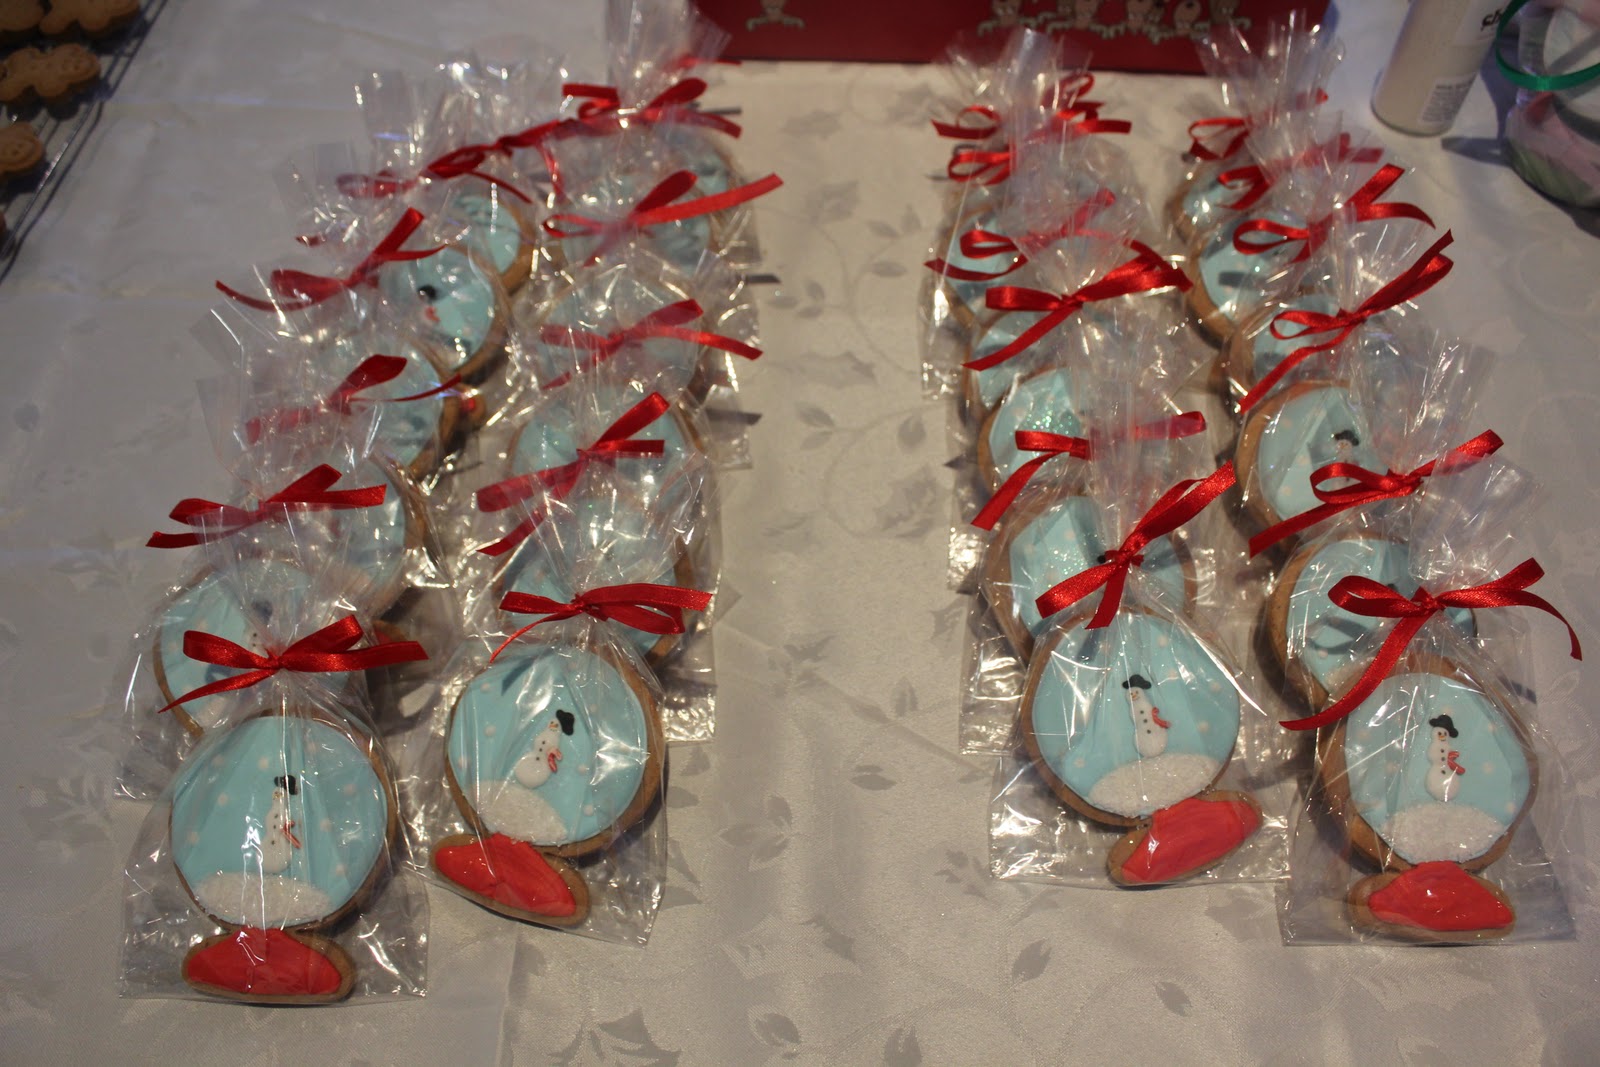
VOILA!!!! All cellophaned up and ready to shape up and ship these bad boys out!!!

I had hoped to also post pictures of the wonderful cookies I received but Australia Post is clearly not having a good year, everything is majorly delayed and 8 days later, I still have no cookies. But you can be rest assured that I will post a blog once they are received so you can see what I got for Christmas!
To take part in next year's Great Food Blogger Cookies Swap here is the link to join and be kept up to date by Julie & Lindsay - http://loveandoliveoil.us2.list-manage.com/track/click?u=66bf80afd570fcb3c6194e49e&id=7bb6c122dc&e=864e135593
Special Thanks to Julie & Lindsay for putting on a fabulous adventure for us food bloggers to take part in, I have loved it and will be definitely joining it again in 2012, I look forward to it with baited breath. Well done to the truely inspirational emails and helpful hints and advice every step of the way. I cannot believe that at least 22,000 cookies travelled far and wide to us all in the past fortnight. I look forward to receiving mine soon.
STAY TUNED & KEEP YOUR EYES PEELED for the Cookies I receive from :
Julie @ http://www.gourmetgetaways.com.au/
and
Yasmeen @ http://www.wanderingspice.com/
STAY TUNED & KEEP YOUR EYES PEELED for the Cookies I receive from :
Julie @ http://www.gourmetgetaways.com.au/
and
Yasmeen @ http://www.wanderingspice.com/
Just saw these on the FB Cookie Swap. OMG, you seriously decorated these all for the cookie swap - that must have taken forever, they look PERFECT. Hat's off!
ReplyDeleteOMG!!! These look so lovely! You have gone to so much trouble and they look just gorgeous!!
ReplyDeleteI hope you have received my cookies now?? I did some Dutch Spiced Speculars with Royal icing. They are on my site too.
I am sorry to say I still haven't received either of my cookie swaps :( I decided to come over and say hi so I could see what was sent :(
P.S I am pleased I have discovered your site, everything looks so beautiful :)
ReplyDelete