I want to share a fabulous meal with you today that I have made twice in a year, tried and tested, it is a great meal idea to share for a family gathering. Maggie Beer is a big Australian Icon, she is an inspiration, I use to watch the “Cook and the Chef” on the ABC channel religiously. She is natural, down to earth and uses as much home-grown, Australian and organic as much as possible, actually I have witnessed her using anything not. She is a big supporter of her local community in the Barossa Valley, I can’t wait to travel there one day as she makes you wish you were there cooking in it too.
So what we have today is a pairing of two fabulous dishes to make the perfect meal, first is the Roasted Chicken in Verjuice and a Parsnip Mash.
To see the sites I used for my Fabulous Roast, please check out my links:
http://www.masterchef.com.au/mothersday.htm
http://www.maggiebeer.com.au/recipes/details/?Item=ArtclsRoastCho

http://www.masterchef.com.au/mothersday.htm
http://www.maggiebeer.com.au/recipes/details/?Item=ArtclsRoastCho

Roast Chicken
20 whole cloves or garlic (approx 2 bulbs)
1 whole lemon (sliced in half)
1 Medium Organic Fresh Chicken (approx 2 kgs)
2 Tbsp of roughly chopped Continental Parsley
50ml Extra-Virgin Olive Oil
Freshly Cracked Black Pepper - to taste
1/2 tsp Sea Salt
125ml Verjuice
125ml Water
1 cup Chicken Stock
Preheat oven to 200'C.

Half fill small saucepan with water and blanch the unpeeled garlic in water once it is at boiling point for 4 minutes, then drain and set aside.
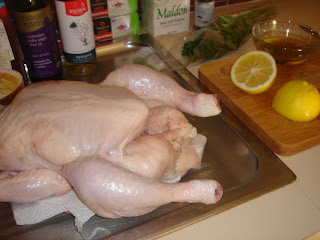
Wash Chicken under cold water and dry thoroughly with paper towel. Next cut the lemon in half and squeeze the juice into the cavity of the chicken, place parsley inside the cavity with the 2 halves of the squeezed lemon. Mix the olive oil with a good pinch of sea salt and pepper and massage into the skin of the bird. Cover the breast section (breast side up) with a foil cap and place the chicken on a trivet in a rectangle bakign dish. Place the baking dish with prepared chicken on the middle shelf in the oven and cook/bake for 40 minutes.

After the 40 minutes, remove foil from the breast section and use the foil to cover the legs (only) to prevent any burning. Pour verjuice over the chicken, place the blanched garlic in the baking dish and add the water to the base of the dish to avoid burning. Cook for a further 20-30 minutes.

Next remove the chicken and place breast down onto the trivet to rest for 40 minutes, covering loosely with new foil.
To make the jus, pour all the pan juices from the baking dish into a small saucepan and add 1 cup of warm chicken stock, simmer for 10 minutes to reduce slightly and pour into a small serving jug, and place jug into the refridgerator to chill slightly whilst chicken is resting. Just before serving, scoop out the fat that has risen to the top, warm the remaining jus in either the saucepan or microwave.

Finally you need to carve the chicken (or get someone else to do this task like I do, as I am self-confessed chicken/turkey massacurist - I CANNOT CARVE!), then place on plate accompanied by roasted garlic cloves, peas and THE Parsnip Pear Mash and pour the jus over the chicken.
Parsnip Pear Mash
4 Parsnips - peeled & largely diced
1 Pear - Peeled & sliced
3 Tbsp Butter - cubed
Pinch Sea Salt
Cracked Pepper - to taste

Firstly boil the prepared parsnips until very soft but not falling apart (this is a longer amount of tiem than potatoes so probably at least 45 minutes. Once boiled, drain off the water and add the pear, then place into the Mouli (THE BEST INVENTION I was introduced to in 2011). Turn the Parsnip and Pear through the Mouli, this may require some help with a spoon (all the fibres will remain in the Mouli).

After the Parsnip and Pear are passed through the Mouli, add the butter, salt and pepper, and mix them through thoroughly with a fork or potatoe masher, until you have a silky smooth mixture.

Serves : 4 - 6 adults
Time : Allow approx 3 hrs (more depending on chicken size and oven)