Showing posts with label Cookies. Show all posts

Saturday, December 14, 2013

The Great Food Bloggers Cookie Swap of 2013 - Maple Pumpkin Gingerbread Cookies


HO HO HO and its a very Merry Christmas with only 11 days remaining to the big day.  And it's another year of the Annual partaking in the Food Bloggers Cookie Swap.


A couple of months ago I have made the decision along with my partner to turn my part-time Cookie Business into a Fulltime Working At Home Mum (WAHM) Business, and since then it has been super duper uber crazy busy! Parties, Events, Corporate Orders and Market Days have kept me run off my feet every single week.  So it was definitely a squeeze to get the 36 cookies required completed for the swap given I insist on producing decorated cookies. AND as usual my definition of a Christmas Cookie is definitely a gingerbread variety...  and I have to say I did excel as far as taste for my family, they deemed it a great look and tasting cookie all round.  Even my Miss 4 ate several and even insisted on taking a 'doggy bag' of them to her Nanny's house on her sleepover.  They did puff nicely the first roll out of each lot of dough, a note is to knead the dough back together well before re-rolling it to avoid distortion and shrinkage in cutter shapes.

Maple Pumpkin Gingerbread Cookies


1/4 cup Butter - softened
1/4 cup Brown Sugar - firmly packed
1 Egg
2 Tbsp Molasses
1/2 cup Maple Syrup
1/2 cup FRESH Pumpkin Puree
1/4 cup Water
3 1/2 cups all-purpose Flour
1 1/2 tsp Ground Ginger
1 tsp Bi-Carb (Baking) Soda
1/2 tsp Salt
1/2 tsp Cinnamon
1/4 tsp Ground Nutmeg
1/4 tsp Cloves
1/4 tsp Ground Black Pepper

Place pumpkin diced into a saucepan of water and boil until soft, drain and put through the food processer until a puree.

Place butter and sugar in the electric mixer and mix until light and fluffy.  Then add the egg and combine well. 

Add in the molasses, maple syrup, pumpkin and water and mix well on medium.

In a separate bowl sift together the dry ingredients and whisk them through so the raising agent is spread throughout.  Then add all at once to the wet/or pumpkin mixture in the electric mixer with dough hook.  Mix on low speed until a ball of pliable dough.

Take the dough out of the bowl and knead it on a floured surface.  Make 2 large discs of dough and put in glad wrap/cling film and place in the fridge for 4 hours (or overnight).

To Make Cookies :

Pre-heat over to 160 degrees.
Remove from the fridge, allow to sit until the dough is rollable, roll out the disc and use cookie cutters to cut out your cookies, place them on a lined cookie tray.
Bake for 15 minutes - check for golden colour as they may need more time depending on your oven.
You can decorate how you wish, I used Royal Icing.

I credit the Blogger Courtney from Sweet Tooth Sweet Life for these gorgeous cookies :
http://www.sweettoothsweetlife.com/2010/12/08/maple-pumpkin-gingerbread-cookies/
I thought these were easy and great, but I did opt to make my own Pumpkin Puree just because I hate pumpkin from a can, I don't think it tastes the same at all, plus you avoid unnecessary preservatives.

I have received 3 Cookie Packages from my fellow Cookie Swappers, their details and pics are below, so far I have nibbled at each package and they taste great! Thank you so much lovely ladies. 

Thank you and my Cookie Bakers for 2013 were :

Alicia from The Kitchen and the Camera :
http://www.thekitchenandthecamera.com/2013/12/white-chocolate-cranberry-shortbread.html

Kate from The Cook's Companion Challenge :
http://cookscompanionchallenge.blogspot.com.au/2013/12/301984-passionfruit-shortbread-biscuits.html

Giulia from Love At Every Bite :
http://www.loveateverybite.com/dolci-desserts/great-sweet-food-blogger-cookie-swap/


If you missed out this year but don't want to miss out in 2014, just sign up with your email here so you get the notifications when the swap is taking names next year : http://eepurl.com/qCABj


Tuesday, June 4, 2013

Sweet Shop Inspired Lolly & Dessert Buffet Tables - Book Yours Today!


I was honoured and thrilled to have my dear friend ask me to cater her new baby girl's Christening with a Lolly Buffet Table, complete with personalised Lolly Bags as the Bombonieries for guests.

The jars I already have, I have been accumulating Apothecary Jars over the recent years and use them for parties and high teas, I use them at home in the kitchen filled with left over cookies from my orders. I just needed an excuse to add to my collection!

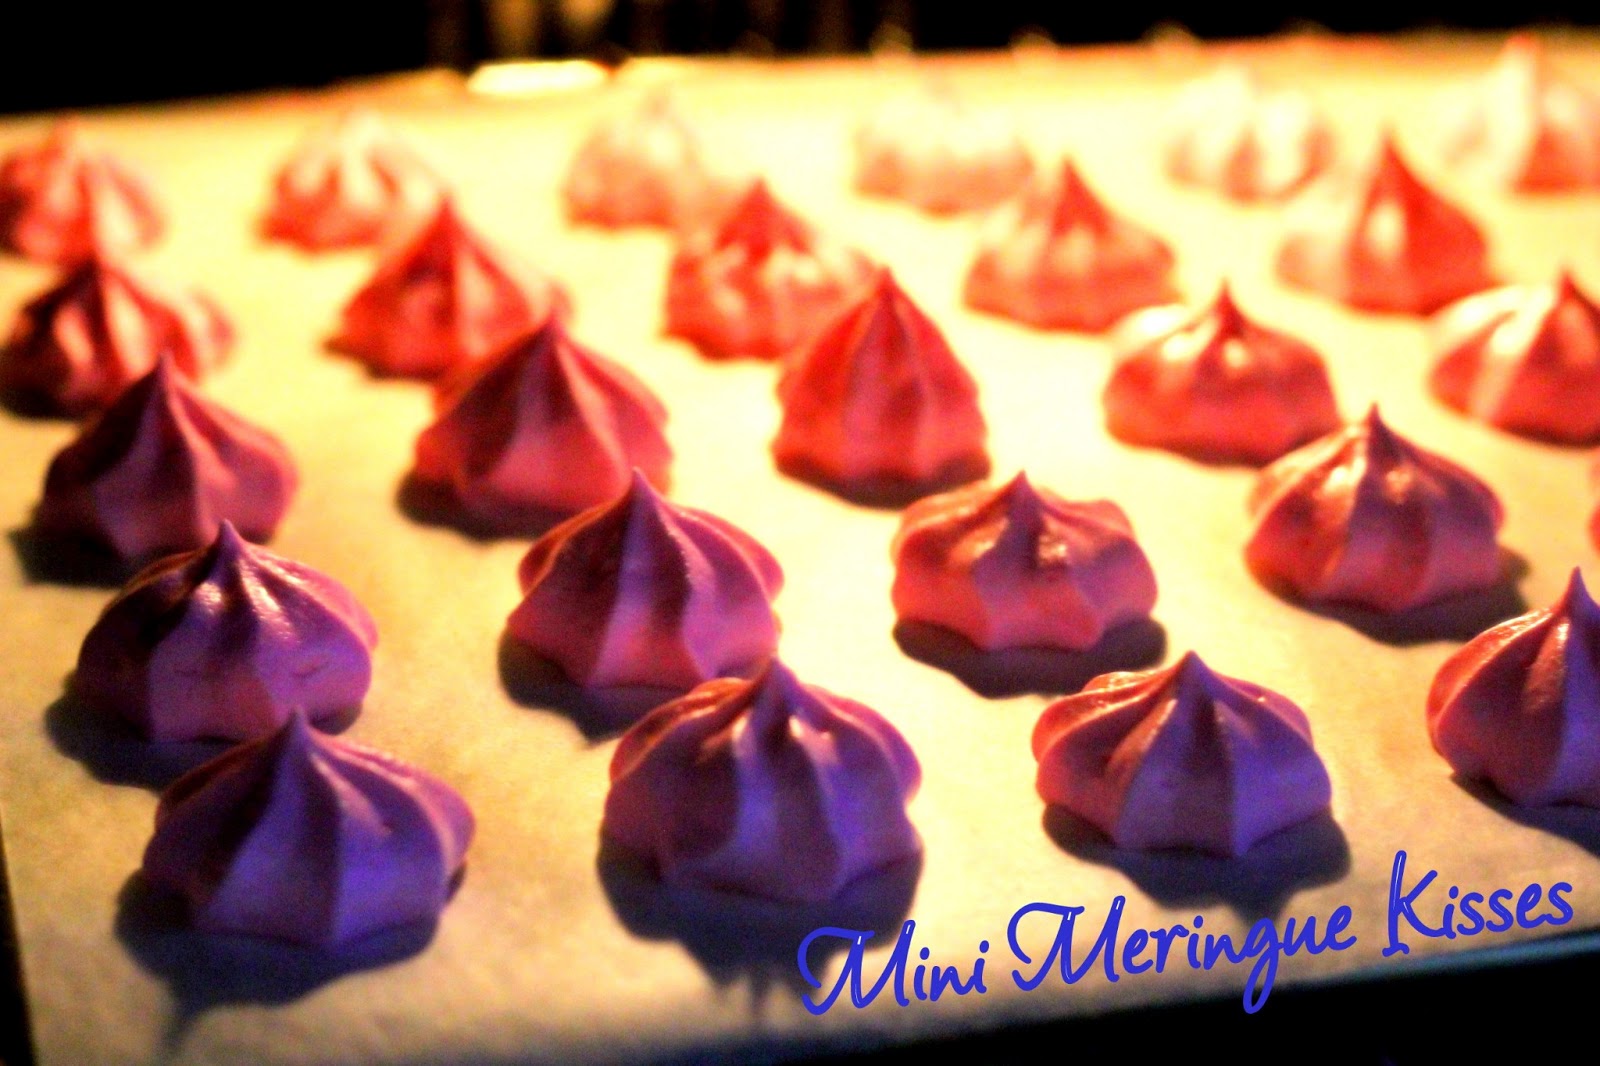
I ordered sweets to match the theme such as Musk Sticks, Mini Jelly Beans, Jelly Babies, Milk Bottles, Raspberry White Chocolate Bullets and Strawberry Sour Straps.  Also made to order I created Cookie Booties, Bubblegum Marshmallow Clouds, Mini Strawberry Meringue Kisses and Strawberry Filled Chocolate Coated Oreo Candies.

All items featured in the Lolly Buffet can be ordered through the Cookie Queen Kitsch'n, minimum 2-4 weeks notice is required, and payment needs to be made 14 days ahead of your function date to allow for ordering the sweets & ingredients.  A bond of $60-100 is required on the day for the Jars (depending on the quantity booked), to cover any breakages, the bond is refunded upon the collection of the jars provided there is no damage to be replaced.

Apothecary & Candy Jars To Hire (+ Bond) :-

Large : $20 each
Medium : $15 each
Small, Pop Stands & Lolly Barrels : $10 each
Scoops/Tongs are provided per jar

Personalised Lolly Bags :-

Plain/Patterned Paper Bags : $ 24/24 bags
Paper Bags with Personalised with Ink Stamped Name : $ 30/24 bags
Paper Bags with Personalised with Event Name Stickers : $ 50/24 bags
Cello Bags Plain : $ 12/24 bags
Cello Bags with Event Name Stickers : $25/24 bags
(Note : For Buffets due to bulky items & pops I use a longer bag of 7 inches & 5 inches wide and the top can be folded over to seal)


Baby Bootie Cookies

$3.50/cookie (min order 12)

Mashmallow Clouds - flavoured Bubblegum

$1.00/marshmallow - cutter shape & flavour of your choice (min order 24)

Oreo Pops

$4.00/pop - choc, vanilla, strawberry or funfetti oreos and coating colour of choice (min order 12)

Mini Meringue Kisses

$2.00/meringue kiss or $3.50/large meringue - colour & flavour of choice (min order 24)

Macarons available upon request also priced at $24 /dozen.


To Book me for your next function, do not hesitate to email me at : cookiequeen@y7mail.com or phone me on 0497 103 638. I can tailor a Lolly or Dessert Buffet to suit your theme, needs or specifications.

Hire/Setup Packages Available


1 - Buffet Basics Package 
  • 2 Jars
  • 3 Lolly Barrels
  • Scoops & Tongs
  • Selection of 5 Sweets (additional cost)
Suits 10-12 Guests
Total = $54.00 + Sweets + Bond
___________________________________
2 - Candy-licious Package 
  • 1 Lrg Jar
  • 2 Med Jars
  • 3 Lolly Barrels
  • Scoops & Tongs
  • Selection of 5 Sweets (500g each)
Suits 14-18 Guests
Total = $124.00 includes choice 5 Colour Themed Sweets + Mini Meringues (Bond required)
___________________________________
3 - Glitz & Glamour Package 
  • 2 Lrg Jars
  • 2 Med Jars
  • 3 Lolly Barrels
  • Scoops & Tongs
  • Cake/Oreo/Lolly Pop Stand 
  • Selection of 7 Sweets (500g each)
Suits 20-28 Guests
Total = $186.00 includes choice 7 Colour Themed Sweets + Homemade Marshmallows 
+ Choice of Macaron Pops or Mini Cookie Pops
(Bond Required)

___________________________________
4 - Seventh Heaven Package 
  • 2 Lrg Jars
  • 2 Med Jars
  • 2 Pedestal Jars
  • 3 Lolly Barrels
  • Scoops & Tongs
  • Cake/Oreo/Lolly Pop Stand 
  • Selection of 5 Sweets (1-1.2kg each)
Suits 30-35 Guests
Total = $246.00 includes choice 5 Colour Themed Sweets + Homemade Marshmallow Shapes  + Candy-coated Oreos + 20 Themed Cookies
(Bond Required)
____________________________________

Ribbons provided on all Jars & Tongs
Buffet Labels available for additional $10
Bunting on front of table available for $18
Flowers available for $22

COOKIE ADD ONS AVAILABLE WITH A 10% DISCOUNT
CUPCAKE ADD ONS AVAILABLE WITH A 15% DISCOUNT

Delivery Fee may be applicable for areas outside immediate area of the CBD/Inner West of Sydney.

Thursday, September 6, 2012

Minnie Mouse Dessert Table & Party for Miss 3!


My little girl just turned 3, and her wish was for a Minnie Mouse Birthday Party, she absolutely adores Minnie Mouse (and Mickey of course). And of course it had to be PINK!  So off I went in the planning stages to plan it with all the bells and whistles.

I run a Cookie Business from home, and I am really hoping to get into doing more Dessert Tables as part of my baking business.  I love doing dessert tables!! They are huge, alot of planing, very imaginative and even more baking but the result is awesome and very rewarding. Children and adults alike love a Dessert Table.

The choices and options are endless, the menu I had was a centrepiece as the Minnie Mouse two layer cake, then we had themed Cupcakes with Italian Meringue in spotted collars, Minnie Cookies with the edible images on them, Ice Cream Cake Pops, Fairy Floss (Cotton Candy) in the jars, Push Pops with Double Chocolate cake/Raspberry Mouse/Meringue/Fresh Raspberry, Minnie Silhouette Bubblegum Macarons and Pink Mini Toffee Apples.

I simply decorated with two big Minnie Mouse helium foil balloons (one each end of the table) and a wall decal I order through ebay that I reused in her bedroom (or could be used on the door).

The kiddies table was all fitted out with the themed table cloth, plates and napkins.  I filled glass mini milk bottles with Raspberry alternative to Ribena with the hot pink & white paper straws. Each place setting had a mini pink toffee apple for each child to take home and to the apple stick I tied a lollipop themed pink & white balloon to it that each child got to take home as an extra surprise.

I hired the child size trestle table and kiddies coloured chairs from Little Ones Party Hire, they were perfect and added a great element to the room, the colour range is wide and you can get all one colour or mixed.

Pin the Bow on Minnie Mouse was played, along with Pass the Parcel, Musical Chairs and Statues with the latest tunes that turned into a kiddies dance off to Party Rock Anthem by LMFAO.


I ordered something a little extra special for the Party Favours, miniture Picnic Baskets, filling them with tiny fizzy and gummi lolles and a Minnie Mouse Funfetti coloured cookie with the black silhouette face and hot fuschia bow. All done up in ribbons and thank you cards. I bought the Picnic Baskets and Lollipop coloured Balloons through Bon Bon Boutique, the girls were gorgeous to deal with here, as I had a week's delay through a Melbourne based site and had to cancel the order and found Bon Bon Boutique to be beyond fabulous in there Customer Service, a hard find these days.

My Minnie Mouse themed Birthday Cake was a bottom layer of Double Lemon and Raspberry with raspberry Buttercream and the top layer was a 70% Cocao Double Chocolate Cake by Miette Bakery San Francisco with Ganache then both covered and decorated in Satin Ice fondant.

The Cupcakes were a Vanilla and Raspberry cake and topped with Italian Meringue Buttercream and alot of sparkle. Then placed into Hot Pink with tiny pin spot Collars, bought from Baking Pleasures.

The gorgeous and most delicious Macarons were made as a custom order in black silhouettes with a Bubblegum filling, by Leah at Half Baked Tart.  These were Marley's deemed most favourite party food item, she absolutely loved them and was the first item she grabbed as she finished blowing out her cake candles! Dont worry about my hours of baking :-( but I understand in the mind of a 3 year old, she dove into the one thing her mother doesn't make on a regular basis.

The Ice Cream Cake Pops looked very effective, I made them with funfetti cake, and white chocolate and topped with with coloured jimmies (American sprinkles) and a Shimmer Sixlet (also American that I order from the USA regularly). I bought a special stand which in my pending USA trip I will purchase a 2nd one for the pair (maybe more but Shhhhhh dont tell anyone)!

Cookies were simple but effective.... a large Mickey silhouette in cookie dough filled with hot pink, black & white jimmies, then topped with a Hot Pink fondant cut out, then I place on with sugar syrup a Minnie Mouse edible image.  All cookies were served in cellophance bags tied with matching satin ribbons.

Finally were the Push Pops, a dessert table item becoming very popular in deed, they are a plastic cylinder with a stick handle and you can push the food up as you devour it.  I always serve mine with spoons so you can tuck into them with gusto! The idea is to layer the contents with cake, crumble, meringue, buttercream, cream, curd, mouse etc the options are endless and they are clear so you usually consider the colour or appearance.  Mine consisted of Double Chocolate Cake, Raspberry Mousse each layered up twice, then topped with italian meringue and a fresh raspberry on top (and a pink of hologram edible glitter). I love the wooden spoons, you can stamp the handles as an additional touch. There are stands you can buy or get made but i usually use these adorable boxes and they fit 6-8 in them perfectly.

So for your Party, Cookie, Cake or Dessert Table needs to make your next event a hit, contact me (Traci) at :

Cookie Queen Kitsch'n

Email - cookiequeen@y7mail.com
Ph - 0404 741 790 (or 61 2 404 741 790)
I am based in Sydney. Minimum order of Cookies are 12, Cupcakes are 24, other items on application.

I look forward to making your next Party extra special!!

Friday, June 1, 2012

Orange Blossoms for My Mum


This year for Mother's Day I got a photoshoot done of Marley, my Brother and myself and had them professionally printed to frame for her wall. They were really gorgeous.  But I thought I would bake something special for her to enjoy through the week.

I made her some special Mothers Day Cookie Flowers in Hot Pink and Red, detailed in sanding sugar. Her is a pic of what I made.


Mum has always loved little cupcakes, the ones you bake in the scalloped cake pan without any wrappers, do you remember the kind I'm talking about? Mum especially used to bake Date Loaf or Sultana Cake mix in them and have butter on top.  So I searched for a scrummy recipe and I fell right over one... from a cute little blog called Pease Pudding at http://peasepudding.wordpress.com/2011/09/26/vanilla-bean-orange-blossom-cake/#comment-5336.

Vanilla Bean and Orange Blossom Cake with Pistachios


Cake

200g Self Raising Flour
100g Ground Almond Meal
150g Castor Sugar (granulated sugar)
1 tsp Bi-carb Soda
250g Plain or Greek Yogurt
150ml Canola or Vegetable Oil
3 Eggs
2 Vanilla Beans - halved and scraped

Orange Blossom Syrup

1 cup Castor Sugar
1 cup Water
1 Tbsp Orange Blossom Water

Icing

1 cup Icing Sugar Mixture
2 Tbsp Milk
1 tsp Orange Blossom Water
1/2 cup Pistachios - slightly crushed

Preheat oven to 180 degrees (moderate oven). Grease and flour the cake pan.

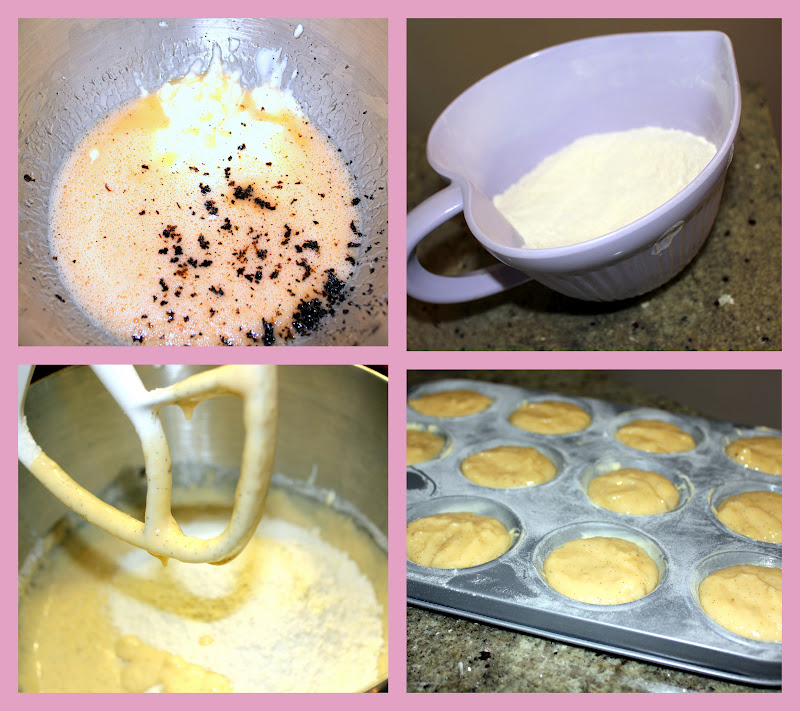
In a large bowl sift in all dry ingredients together (flour, almond meal, sugar).  Then in the electric mixer whisk the wet ingredients together (yogurt, oil, eggs, scraped vanilla bean seeds).

Take the bowl off the electric mixer and stir the dry ingredients into the wet ingredients, until just mixed in without over stirring or the raising agents will be bruised and wont work properly.

Using soup spoon (preferably), spoon the mixture into each cupcake hole. Tap pan on bench to knock out air bubbles, and place into the oven and bake for 15-20 minutes. Longer for deeper cupcakes, to test the cooked cake should be soft but bounce back at touch.

Alternative is you can bake an 8 - 10 inch round cake.

Once removed from oven you can start the syrup, so you can pour over cakes whilst still warm, the syrup will soak in best if done when cakes are warm, however if you miss this, you can heat cakes in microwave for 15-20 seconds to reheat.

For the beautiful syrup, place the sugar, water and orange blossom water into a small saucepan on medium heat.  Simmer until the sugar is fully dissolved, and reduce the liquid by a third, it will have thickened.


Pour the hot syrup over the cake/s and allow it to soak in, I find making a few holes with a skewer helps the syrup soak through.


To make the glaze/icing mix the icing sugar with milk and orange blossom water together, the icing sugar needs to be mixed in fully, and the consistency should resemble the thickness of honey. Pour over the cakes, you can use a butter knife or small cake spatula to smooth or make even. Whilst the glaze is wet, sprinkle with the pistachios and leave to allow to dry/set.