Friday, January 27, 2012

It’s a New Year – Year of the Cookie!


Happy New Year to my beloved readers! 
I am not a person that makes New Year Resolutions, ever! And this year will not be the exception. However I do have a To Do List. An extensive To Do List.

  • Year of The Cookie – I mean Business
  • Get Blog onto 3 collated pages
    - Home : Everyday Baking
    - Batter Up Kitsch’n Challenges (12 months, 12 Blogs, 12 Recipes, 12 Challenges – 1 Result)
    - Cookie Queen Kitsch'n - Cookie Business Promotion
  • Commence and stick to monthly Kitsch’n Challenges
  • Increase Market Sales
  • Get a Kitchen Cupboard just for cookie & cake decorating supplies
  • Organise Cookie Cutters so I know what I have
  • New Blog Header

In November I have started attending a Market and have a regular stall, the Market is the Artisan Fair, it took over from the Hide & Seek Market in Kellyville, it doesn’t appear to get alot of traffic like it use to, location seems to be a main factor as its a little off the main drag. So from February it is being relocated to the Castle Hill Showground the 3rd Sunday of every month, much better position so we’ll see how that goes in Feb and March.

Well January has kicked off a few orders already, I love new orders for new things, its so fun.

Here is this week’s Ballet Pointes for SJ Dancers for Registration Day for the Dance School at Moorebank, Sydney.

I should have some fabulous new recipes up in my coming posts, I just received a box of goodies from http://www.usafoods.com.au/ and with boxes of snickerdoodles, confetti cupcakes, canned caramelised apples and toasted marshmallow crème there are some wonderful treats ahead for you all.

Also I have lots of new cookie cutters, including :
  • Cinderella
  • Crowns & Tiara
  • Moustaches
  • Monkey head
  • Ballet Pointe
  • 3 different Ice Cream Cones
  • Mickey Mouse (2 profiles)
  • Chip and Dale
  • Macaw
  • 2 gorgeous sitting cats
  • Diamond Ring
  • Milk Bottle

And now I have started making my own unique cutters, can’t wait to try out some more. Here is one I just made:


Here are some of my latest cookies in the past month, take a sneak peek, any Christmas cookies can be adapted with different colourings eg ladybirds, Elves into clowns or gnomes, High heels in any colours sparkle or plain, Ballet Slipper to any colour to suit Dance School, Babushkas in any colour and of course Monograms on circles, squares, rectangles, hearts or plaques.


ORDER YOUR COOKIES NOW FOR 2012 - YEAR OF THE COOKIE!

Sunday, January 15, 2012

Snickers Please!


Not to disappoint, I posted earlier in 2011 when posting the http://www.cookiequeenkitschn.blogspot.com/2011/09/cheesecake-supremo.html that I would post my Snickers Cheesecake when I baked it again, as I had forgotten last time to take a photo of the final result.

The cheesecake is unique to how I have made a cheesecake previously, it is baked for over an hour in a bain-marie and is baked for over an hour and then rested in the oven for another hour. Quite a process but the result is amazing and well worth the effort.

My recipe was sourced from the ever faithful http://www.mybakingaddiction.com/snickers-cheesecake-and-vlog/ have a peak as she has some amazing recipes to try.

Recipe Breakdown:

Base
1 box of Digestive Biscuits (ground to crumbs)
125g Butter (room temp)
3 Tbsp Castor Sugar
½ tsp salt

Cheesecake
 2 x 250g packets of Philadelphia Cream Cheese (8 oz)
1 ¼ cup Castor Sugar
4 Large Eggs
¾ cup Thickened (Heavy) Cream
1 Tbsp Vanilla Extract

Topping
1 Snack Pack of 20 mini Snickers Bars
1/3 cup of crushed nuts (I use cashews)
1/8 – ¼ cup of caramel syrup

Preheat oven to 180’C (10 degrees under if fan forced), wrap a 9 inch (24cm) springform pan in heavy duty foil. This reduces water seeping in when using a water bath. I also took Ms Baking Addictions advice by taking the extra step by placing the foil wrapped spring form pan inside an oven bag while baking.

First mix together the crust ingredients in a food processor and press into the bottom of your tin and about 1 inch up the sides. Bake for approximately 10 minutes and then cool completely on a wire rack before filling the case.  Begin to boil a large pot of water for the water bath.

In the bowl of your mixer, combine the sugar and cream cheese and cream together until smooth. Add eggs one at a time, fully mixing well with each addition before adding the next egg. Make sure to scrape down the bowl in between each egg. Add the cream and vanilla and mix until smooth.

Pour batter into prepared (cold) crust. Place pan (in the oven bag) into a larger pan and pour boiling water into the larger pan until halfway up the side of the cheesecake pan. Bake 45 to 60 minutes, the edges will appear to be set, but the centre will still have a slight jiggle (this will set as it cools). At this point, close the oven door, but turn the heat off, and let it rest in the cooling oven for an hour. After one hour has passed, carefully remove the cheesecake from the water bath and place on a cooling rack to cool completely. Once the cheesecake is completely cooled, place it into the refrigerator for at least 5 hours, preferably overnight.

Slice up the snickers bars finely and top the cheesecake once out of the tin(this may require the assistance of a hot knife), sprinkle with peanuts and drizzle with the caramel syrup.

Finally slice it up for your guests and be careful not to drool onto it as they probably won’t appreciate that. Serving with vanilla icecream with assistance lessening the sweetness. A great afternoon delight for guests!


Thursday, January 5, 2012

Pretty Please with a Cherry on Top!


Another birthday here we come and it is my close friend and also the bestest Boss in the World! And so its time to whip up something super special, and given that she isn’t a huge chocolate cake fan I had to rule out a few must trys! So my thinking cap went on and came up with a fantabulousso cheesecake (yes I know another cheesecake this year, what is with everyone loving cheesecake lately?).

I stumbled upon a saved recipe I had squirreled away for a special time… so out it popped MINI RAINBOW CHEESECAKES!! I sourced this recipe from an old fav at http://www.bakersroyale.com/cheesecake/st-patricks-day-dessert-rainbow-cheesecakes/.

Next step to work out my rainbow colours, 5 in total and I went for my beloved Americolors in the Electric colour range plus the Super Red.

The trick for them looking good (and effective) is to try to use thin white cupcake wrappers or otherwise pastel ones so the colours are seen through the papers.

Cheesecake
2 x 250g (or 16-20 oz) blocks Cream Cheese (softened)
1 cup Castor Sugar
1 Tbsp Vanilla Essence
2 eggs
1/3 cup Thickened Cream
Food Colourings (5 vibrant)

Topping
Whipped fresh cream
Maraschino Cherries with stems

Preheat oven to 180’C (10 degrees under if fan forced). Place a patty cake wrapper into each of the 12 holes of a muffin tin.

In mixer bowl place cream cheese and sugar and cream them together til smooth.  Next add in you vanilla and eggs and mix them in well.  Finally add in your thickened cream and mix it til just combined.

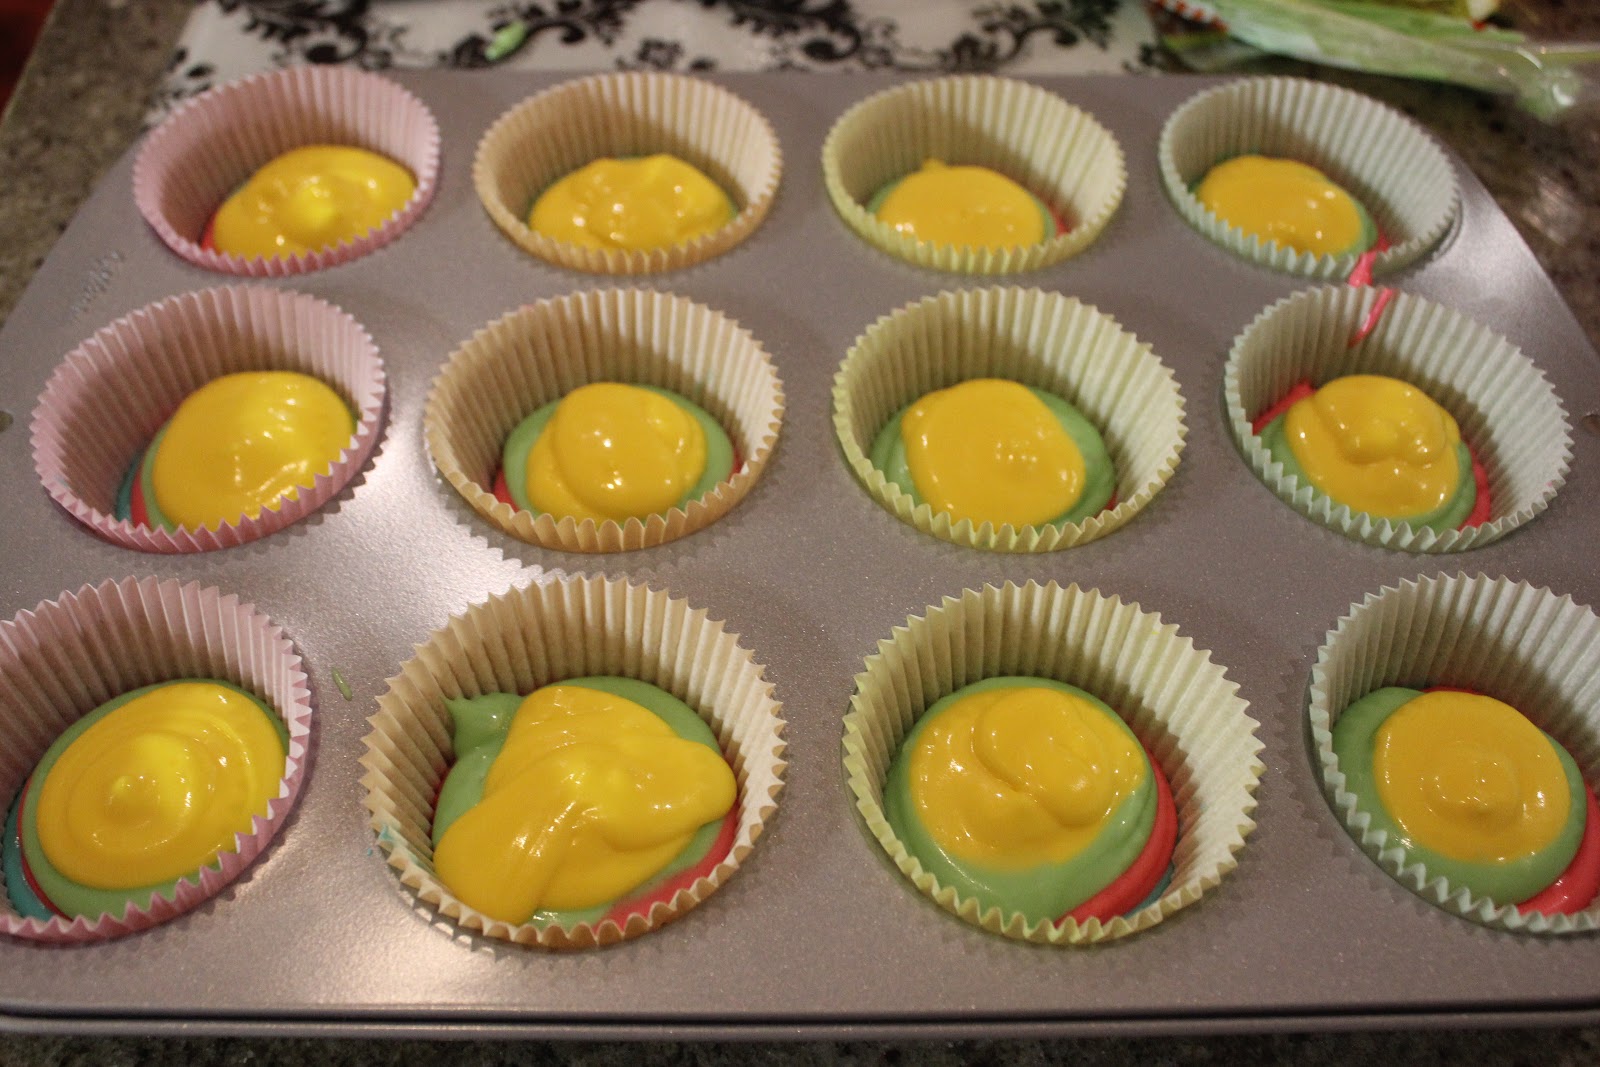
Next step divide your mixture evenly into 5 bowls (4 plus your current mixing bowl), approximately ¾ cup of mix in each bowl.  Colour each bowl of mix a different colour with a generous squirt of Americolor gel (food colouring). Mix it well with a table or dessert spoon, then spoon in a layer of mix of each colour into patty cake wrappers.


Be careful when selecting the colour order, it makes a difference to the look when you place certain colours next to each other. I always put yellow next to red and blue and green always separated with an orange or pink.

Once mix ready in wrappers, place the pan into the oven and bake for 30-40 mins, check they are firm and not jiggley before you remove, if they start to go golden but still giggly, turn off oven but leave them in the heat to firm up.  Be aware and don’t freak out that they will collapse and crack, this is normal apparently. I read to worry if they drop, but hello they definitely drop and all of them and they look like earthquakes! But you fill the craters with the whipped cream and you will never know to the untrained eye!

Once cheesecakes are cool, whip the cream up and place a scoop on the top of each cheesecake, and put a “pretty please” cherry on top! Stem up!

Note - In Australia you can get the Maraschino Cherries from both Campbells and www.usafoods.com.au (based in Melbourne). Let us know if you locate them anywhere else!

Thursday, December 29, 2011

Cookie Swap 2011 Guest Post from Gourmet Getaways


As I promised you all I would blog on my received cookies from Julie @ Gourmet Getaways. I have only received 1 of my 2 cookie lots, so to date I can only give you the one I have, hopefully (fingers crossed) I receive my 2nd dozen soon.

My cookies came from Julie at http://gourmetgetaways.com.au/, which I was quite excited about, her food blog is full of amazing ventures and tastings that make me want to sneak into her handbag and sample the wares also.  If you’re like me you would also know Lorraine at Not Quite Nigella (I have been lucky enough to win 2 prizes through her blog and I read her daily posts via email with relish) and I follow her recommendations on cafes, restaurants, hotels, events etc, well Julie is very much the same with photography that puts me to shame!  She has made my cookies look like something in an American shop window or candy store!


Julie made me some traditional Dutch Speculaas. Please find the Cookie Swap Recipe here on Julie’s Blog http://gourmetgetaways.com.au/entries/general/the-great-cookie-swap-2, definitely worth making, they are super scrummy! The recipe is a keeper in my Christmas file.  Whilst you’re at it whip yourself up a batch for the family, and sit down and enjoy them with a Hot Chocolate and read the delights on Gourmet Getaways.